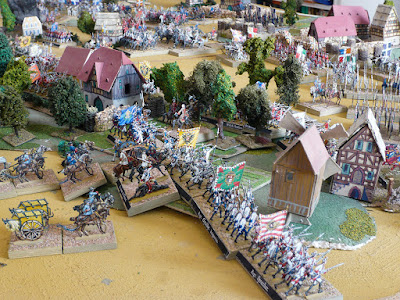
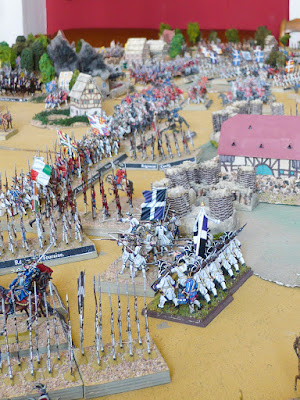
The first images show the initial deployment of the two rather large Armies. You are looking into a Sea of Flags.
Above see more of the entire table. Both armies are deployed as per the situation at around 08.00 in the morning.
Saxe & part of his escort seen here well ahead of the army reconnoitring the situation from the heights south of the burning village of Vlytingen. See below for the sketch of our scenario with both sides initial deployment & my orbats for both armies.
My sketch of the scenario is loosely based on the situation illustrated in one of the maps found in the Austrian General Staff book.
As usual, I inserted my units into the Volley&Bayonet breakdown of the historic orbats. 85,000 French with 110 position guns versus 71,000 Allies with 70 heavy guns. This is the biggest scenario I ever fought with my miniatures! A near 2,000 were on the table. I loved it. My display rooster sheet layout truely arrives at its limit, I must say.
A number of Austrians were fielded by fellow gamer M***, while F*** provided a French artillery stand as well as a stand of the regiment Auverge with his 3-d miniatures (by Warlords foundry). See below:
The view accross the Allied starting position.
Detail of Wolffenbuttel's troops occupying the village of Groot Sprouwen.
Below see the burning village of Vlytingen now being abandoned by its garrison – the Kings Regt, representing the British Foot Guards in my scenario.
The French go into the attack. Below see elements of the French right wing under d'Éstrées' & Clermont-prince tasked to seize the villages of Lauffeld, Montenaken, & Wirlé.
The French centre is advancing to support the French right.
Intermingled with the dense masses of French troops note my newly painted French artillery draught horses, guns and wagons. I'm particulary fond of this 24-pdr barrel mounted on an extra carriage for the march. This beast is now nicknamed the "Ark of the Covenant" by my French troops.
Below see some more pics of my latest paint job.
Now back to the battle. Below see the Austrians under Daun on the far right of the Allied position.
The Allied centre.
Auvergene again.
Detail of the French capture of Lauffeld. This time it was Belsunce – or Monaco in 1747 – that kicked the Allies out. Montenaken and Lauffeld were atacked and captured each 3 times. The Allies managed to recapture it 3 times. A really hard fought affair it was.
Below see the regt Dauphin inside Lauffeld the moment before the Allies prepared for another counter attack.
Below see the Dutch and Bavarians under Waldecks' command seizing Lauffeld, evicting the French for the 3rd time.
My V&B scenario demanded for only two Dutch infantry regiments. Mine are really Brunswickers. I only took the effort to paint two flag bearers replacing the Brunswick flags. This worked out rather well, I believe. If you dim down the light a bit, the Brunswick yellow drummers dress will look perfectly orange, I'm sure. Also my Waldeck command stand isn't really Dutch. Its the command stand of my recently painted S.A.R. le marcgrave Charles de Brandenbourg-Schwedt – a Prussian, I only replaced S.A.R. with an Austrian general leaving his original entourage. It includes his servant named Pietro, a black, dressed in orange livery. Now if this isn't a dead on match with "te Zwarte Piet". The two other figures are a calvinist field chaplain (fine match as well) & an officer of the Prussian Garde-Du-Corps (borderline – admitted).
Now back the the battle. Finally, the French had ran out of troops. All were found exhausted. Senneterre, with his left wing troops amusing the Allied right wing and the Gardes & Maison du Roi was all that was left. Not enough to punch a hole into the still solid Allied line. The Allies remained masters of the villages, hence, this refight turned out to be a clear Allied victory. A Cheers to Cumberland & his brave troops. But no more then one - after all, I played on the French side, of course.
Now – wait a minute. The battle of Lauffeld an Allied victory? Silly Cumberland alongside (historic) alltogether inactive Austrians versus Splendid Saxe at the head of a French Army at highest spirits, thanks to the presence of Sa Majesté?
Now, how could this happen?
Well, I must say, the French attack was really rather ill coordinated. I played on the attacking French right. My numerous & superior artillery was quite behind and only managed to sustain the 3rd attack on the two Allied strongholds of Lauffeld & Montenaken. A big mistake. Also my co-player A*** commanding on the left, was unwilling to support me with 1 or 2 units of the French heavy guns, that were all under his command. He preferred to concentrate them all in the centre in a giant battery that soon ran out of targets and, as a result, spend most of the day doing nothing. The cavalry could have been employed better as well. They didn't do all that much that day. Another reason for the French failing to crush the Allies' lines was the early activation of the Austrian forces. In the historic battle Bàtthyànyi's Austrians did very little to support the hard pressed Allied left. In my scenario the Austrians needed a die roll to be activated – i.e. allowing them to engage in offensive moves or move any closer then 12 inch towards enemy units. Unfortunately, the Austrians passed the die roll in turn one. I'll have to rethink that for our next Lauffeld refight.
For a summery, I would say, the game worked really well. It will be played again. I'm sure.


